
In this lesson, you will learn how to use change event categorized as form events in the jQuery. The change event is fired when the value of any element on the web page changes. This event is limited to form menus like <input>, <textarea> and <select> elements.
Introduction to Change event in jQuery
For selected elements such as input fields, check boxes, and radio buttons, the change event is fired immediately when the user selects the web element with the mouse.
The syntax of the change event is:
.change(function(){});
The function has an optional parameter, and you can use .change() without it as well. It also can be written as .on("change", function() {} );
Example of a Change event in jQuery
In this example, we will create a list of fruits, and as the user selects an option, an image of the selected fruit will be displayed.
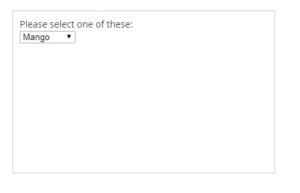
Change event example
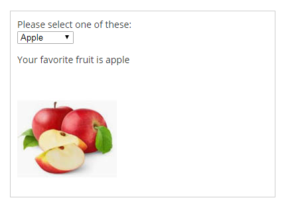
Change event example
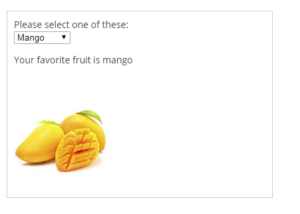
Change event example
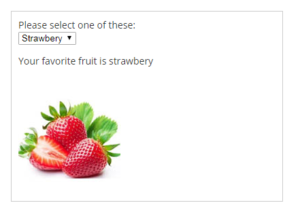
Change event example
The HTML
<div id="container">
   <form action="#" id="form1" method="post">
      <label for="fruit">Please select one of these: </label>
      <select name="fruit" id="fruit">
         <option value="mango">Mango</option>
         <option value="apple">Apple</option>
         <option value="strawbery">Strawbery</option>
         <option value="banana">Banana</option>
      </select>
      <br>
      <p id="fruit_name"></p>
      <br>
      <img src="empty.jpg" alt="fruit image">
   </form>
</div>
The CSS
#container {
	margin: 20px;
	padding: 10px;
	border: 1px solid #ccc;
	width: 400px;
}

label {
	width: 300px;
	display: block;
}

input {
	width: 80%;
}
The jQuery
<script src = "https://ajax.googleapis.com/ajax/libs/jquery/3.4.0/jquery.min.js" ></script>
<script>
    $(document).ready(function() {
        $("#fruit").change(function() {
            var str = "Your favorite fruit is " + $("#fruit").val();
            var str_img = $("#fruit").val() + ".jpg";
            $("#fruit_name").text(str);
            $("img").attr("src", str_img);
        });
    });
</script>
The above code gets the value of the selected option and concatenates it with the string “.jpg” to create an image. I have kept the example as simple as possible to illustrate the change event. You can use an array or pre-defined string names to get the picture. In case you have any question regarding the change event, please leave it in the comment section.
| jQuery Submit Event | Tutorial Home | jQuery Select Event |
Comments