
In this article, I’ll explain the basics of file upload and download in PHP. First, I’ll explain the basics of PHP configuration options. Following that, we will go through an example to fully understand the file upload and download process in PHP.
File Upload and Download in PHP
There are a few PHP configuration settings that you need to check before creating a file upload form. These options are available in the php.ini file. To view the settings in php.ini, create a PHP file on your server with the following code, and open it from the browser.
<?php echo php_ini_loaded_file(); ?>
Here is an excerpt from the file with some default values.
-
Whether to allow HTTP file uploads.
file_uploads = On
-
Temporary directory for HTTP uploaded files.
Will use system default if not set.
-
upload_tmp_dir =
-
Maximum allowed size for uploaded files.
upload_max_filesize = 16M
-
Maximum number of files that can be uploaded via a single request
max_file_uploads = 20
-
Maximum size of POST data that PHP will accept.
post_max_size = 20M
-
max_input_time = 60
memory_limit = 128M
max_execution_time = 30
PHP File Upload key Options
file_uploads
The default value of file_uploads directive is on. The value of the file_uploads should be set to “on” if you want the file upload functionality.
upload_max_filesize
The upload_max_filesize directive allows you to set the maximum size of the uploaded file. By default, it is set to 2M which isn’t enough these days, so you might want to increase this. If you don’t increase the file size and try to upload a file which exceeds maximum file upload limit, PHP will throw an error ‘file exceeds upload_max_filesize’. You can overwrite this setting option using the .htaccess file as well.
upload_tmp_dir
PHP saves the uploaded file in a temporary directory. Once it is stored in a temp directory, you can access, move or manipulate file using PHP file functions. You don’t have to set this directive, system default temporary directory is enough to hold your files.
post_max_size
The post_max_size directive lets you define the maximum size of the POST data. Since the file is uploaded with a POST request, this value has to be greater than what you have set for the upload_max_filesize. For example, if you have set the maximum file size to 40M, it is saved to set post_max_size to 50M.
max_file_uploads
With one post request, you can upload up to 20 files. You can set the maximum number of files that can be uploaded at a time.
max_input_time
The default value is 60 seconds, which is good enough to parse the input of a form.
max_execution_time
It is the maximum number of seconds a script is allowed to run. By default, the value is 30 but generally, image uploading and manipulation can consume more than 30 seconds. You can set the value according to your requirements.
Increase file Upload Size in .htaccess
Copy paste the following code in your .htaccess file and upload it in your web root directory.
php_value upload_max_filesize 10M
php_value post_max_size 50M
php_value memory_limit 128M
Example of File Upload in PHP
Create a folder “uploads” in your root directory. This is a directory, where all uploaded files will be saved.
We are going to create two files: fileinput.php and fileinput_ac.php
File Upload Form
Open fileinput.php and copy the following code, save and open in the browser.
<!DOCTYPE html>

<html>
<head>
  <link href="https://fonts.googleapis.com/css?family=Open+Sans" rel="stylesheet">
<style>
body{font-family: 'Open Sans', sans-serif; color:#333; font-size:14px; padding:50px;}
#book_form{padding:50px;}
label{display:inline-block; width:140px; }
th, td{width:120px;}
table{width:50%; text-align:left;}

</style>

</head>
<body>

<form enctype="multipart/form-data" action="fileinput_ac.php" method="post">
<input type="hidden" name="MAX_FILE_SIZE" value="3000000" />

Select file to upload:
<input type="file" name="data" />

<input type="submit" name="submit" value="Upload  File" /></form>
</body>
</html>
The data encoding type, encypte must be specified as enctype=”multipart/form-data”
Once the file is being uploaded, the information about the file will be stored in variable $_FILES.
The global $_FILES will contain all the uploaded file information.
$_FILES[‘data’][‘name’] will contain the original name of the file
$_FILES[‘data’][‘type’] will have the mime type of the file. An example would be image/gif.
$_FILES[‘data’][‘size’] stores the size, in bytes, of the uploaded file.
$_FILES[‘data’][‘tmp_name’] has the temporary file name of the file.
$_FILES[‘data’][‘error’] will have the error code associated with this file upload.
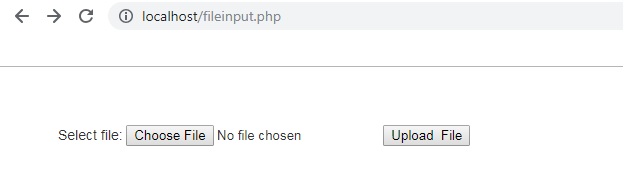
File Upload Form
File Upload Code
Open fileinput_ac.php
Copy the following code, and save.
<?php
  if (isset($_POST['submit']))  {

   // check uploaded file size
  if ($_FILES['data']['size']  ==  0)  {
 	 die("ERROR:  Zero  byte  file  upload");
  }

  // check  if  file  being uploaded is an image.
  $allowedFileTypes  =  array("image/gif",  "image/jpeg",  "image/pjpeg");

  if  (!in_array($_FILES['data']['type'],  $allowedFileTypes)) {
  die("ERROR:  File  type  not  permitted");
  }
//  check  if  this  is  a  valid  upload
  if  (!is_uploaded_file($_FILES['data']['tmp_name']))   {
  die("ERROR:  Not  a  valid  file"); }

// set  the  name  of  the  directory to save the file being uploaded
 $uploadDir  =  "./uploads/";
 move_uploaded_file($_FILES['data']['tmp_name'],  $uploadDir  .  $_FILES['data']['name'])  or  die("Cannot  copy  uploaded  file");


  echo  "File  successfully  uploaded  to  "  .  $uploadDir  .$_FILES['data']['name'];
}
  ?>
Now open the fileinput.php in the browser, and upload an image or a file. Now go to the folder ‘uploads’. You will see the file being uploaded in the ‘uploads’ folder and a success message in the browser.
The move_uploaded_file function is used to move the uploaded file to the target location. It takes two parameters. The first parameter is the filename of the uploaded file, and the second parameter is the destination path where you want to move the file.
move_uploaded_file( source, target);
You can do some debugging info using
<?php
print_r($_FILES);
?>
Example of File Download in PHP
Create two files: download.php and download_ac.php
Copy the following code in download.php
<html>
<head>
  <link href="https://fonts.googleapis.com/css?family=Open+Sans" rel="stylesheet">

<style>
body{font-family: 'Open Sans', sans-serif; color:#333; font-size:14px;}


</style>

</head>
<body>

    <a href="download_ac.php?file=220.jpg">Download file</a>

</body>
</html>
File Download Form
Open download_ac.php and copy paste the following code.
<?php

if (isset($_GET['file']) && basename($_GET['file']) == $_GET['file']) {
$filename = $_GET['file'];
} else {
$filename = NULL;
}

$err_msg_msg = 'Sorry, the file you are requesting is unavailable.';

if (!$filename) {
// if variable $filename is NULL or false display the message
echo $err_msg_msg;
}
else {

$path = 'uploads/'.$filename;

// check that file exists and is readable
if (file_exists($path) && is_readable($path)) {

$size = filesize($path);

//sent the headers
header('Content-Type: application/octet-stream');
header('Content-Length: '.$size);
header('Content-Disposition: attachment; filename='.$filename);
header('Content-Transfer-Encoding: binary');

// open the file in binary read-only mode

$file = @ fopen($path, 'rb');
if ($file) {
 	fpassthru($file);
exit;
}
else {
echo $err_msg;}
        }
        else {
       echo $err_msg;
 }
}


?>
Related Articles
Comments