
In this lesson, you will learn about the form handling in jQuery.
Introduction to forms in jQuery
Web forms provide a way of collecting information from users. The user can enter his/her shipping detail into web forms or write a message to send an email using these forms. Some sites are heavily based on user’s data to function; for example, Amazon wouldn’t be able to in business if it has no way of getting people’s orders. jQuery makes forms so easy to work with. It helps you build forms that are user-friendly and process information being entered more accurately.
HTML provides a variety of tags to build a web form and its controls, such as <form>, <input>, <textarea>, etc. It also decides what type of method is used to send data to the server (post or get) and where to send the data. Most of the web form elements use the <input> tag. For example, text fields, passwords, radio buttons, check buttons, etc. For example, to create a text field to get the user’s first name, you will need to write the code something like this:
<input type="username" type="text" id="fnam">
To select this text field in jQuery, you have to select it first.
var user_input = $("#fname");
Now, when you have selected the text field on the web form, you can perform some functions on it. For example, to extract the value of the text field, you can use:
var user_input = $("#fname").val();
But what if you want to select all text fields on the web form, such as first name, last name, email, etc.? In such a scenario, you will use a CSS attribute selector like this:
$("input [type='text']")
There is also a shorthand form of achieving the same as above.
$(":text")
To select all input fields such as text fields, text area, select, button use $(":input")
To select all text fields use $(“:text”). You can also refer to a specific form while selecting its elements. $("#form_id : text")
jQeury form filters
jQuery also allows you to select a web element based on its particular state with the help of handy filters.
$(":checked") selects all fields that are being checked by the user. This is specifically used to check the state of checkboxes and radio buttons. For example, you have a web form that takes the payment information from the user for the products on an online store. You have a group of radio buttons to select a payment method with different values (cash on delivery, visa card, debit card, PayPal). Now, a group of radio buttons all share the same name. You can use this filter to find the value of the checked radio button, like this:
var payment_option = $('input [name="payment"]:checked').val();
$(":selected") selects all selected option elements, which allows you to find out which selection the user has made from the drop-down menu. For example, a web form lets the user select a US state from the 50 states. To find out which state user has selected, you can write:
var state = $("#state :selected").val();
Get and Set the value of the webform
To extract the value of a particular web element in a form using jQuery, write:
var field = ("#email").val();
You can also set the value of a field by simply passing the value to the val() function.
$("#fname").val("John");
To set the focus on the first text field of a web form when a page is loaded, write:
$(document).ready(function() {
    $("#username").focus();
});
To disable or turn off a form field, you can use the following code:
$(":input").prop("disabled", true);
These look simple but enhanced forms to improve the user’s interactivity with the web application. You can also try out some of the jQuery effects like fadeIn(), fadeout() on these web forms to create your animated web forms.
Example of forms in jQuery
In this example, we have created two web forms: Sign up and Sign In. On the document load, Log In form is hidden. When the user clicks on ‘Log In’, the Log In form appears and Sign up form disappears.
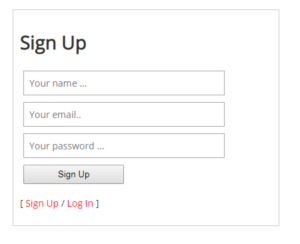
Sign up Form
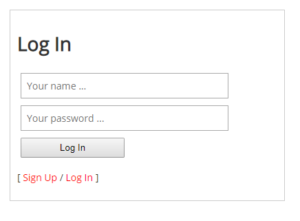
Log in Form
The HTML
<div class="text-center" id="container">
<form id="login" >
   <h1>Log In</h1>
   <input class="form-control" placeholder="Your name ..." />
   <input class="form-control" placeholder="Your password ..." /><br>
   <button class="btn btn-primary btn-block">Log In </button>
</form>
<form id="signup" >
   <h1>Sign Up</h1>
   <input class="form-control" placeholder="Your name ..." />
   <input class="form-control" placeholder="Your email.." />
   <input class="form-control" placeholder="Your password ..." /><br>
   <button class="btn btn-danger btn-block">Sign Up </button>
</form>
<p>[ <span id="btn-signup">Sign Up</span> / <span id="btn-login">Log In</span> ] </p>
The CSS
#login {
	display: none;
}

input,
button {
	margin: 5px;
}

button {
	width: 40%;
	padding: 5px;
}
The jQuery
<script src = "https://ajax.googleapis.com/ajax/libs/jquery/3.4.0/jquery.min.js" ></script>
<script>
    $(document).ready(function() {

        $("#btn-login").click(function() {
            $("#signup").hide();
            $("#login").show();
        });

        $("#btn-signup").click(function() {
            $("#login").hide();
            $("#signup").show();
        });
    });
</script>
Before moving on to the next lesson, it is important that you understand each concept being explained in this lesson. If you have any question, feel free to leave it in the comment section below.
| jQuery ‘on’ Function | Tutorial Home | jQuery Form validation |
Comments