
How do we handling events in React?
You may feel comfortable working with events in JavaScript or jQuery, where you write imperative code to handle the events. However, React has a slightly different approach to handle that. Rather than selecting the relative DOM elements and attaching event functions to these, React wraps these in their own wrapper.
In React, events are named using camelCase. For example, an ‘onclick’ event in JavaScript will be ‘onClick’ in React. In JavaScript, you return false to prevent default behavior but in React, you must call preventDefault explicitly. The last difference is the way you pass a function as the event handler.
For example, in HTML, you will write:
<button onclick = "handleClick()">Click here</button>

    <script>
    function handleClick() {
        console.log('button was clicked')
        return false
    } </script>
The equivalent of the code above in React:
import React from 'react'
import ReactDOM from 'react-dom'
function App() {
function handleClick(e) {
e.preventDefault();
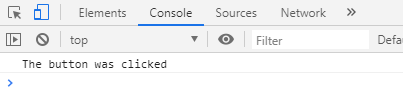
console.log('The button was clicked')
}
return ( <button onClick = {
handleClick
} > Click here </button>
)
}
ReactDOM.render( < App / > , document.getElementById('root'))
When using React, you don’t have to call the addEventListener to add listeners. Instead, just provide a listener when the element is initially rendered. SyntheticEvent wraps around the native event of all browsers and help with the cross-browser compatibility issue.
React Event Handling
If you have to write a similar functionality in the class-based component, the code will be:
import React from 'react'
import ReactDOM from 'react-dom'

class App extends React.Component {

    constructor(props) {
        super(props)
        this.handleClick = this.handleClick.bind(this)
    }
    handleClick(e) {
        e.preventDefault();
        console.log('The button was clicked')
    }

    render() {
        return ( <button onClick = {
                this.handleClick
            } > Click here </button>
        )
    }
}
ReactDOM.render( < App / > , document.getElementById('root'))
In class-based components, you will use onClick = {this.functionName} instead of onClick = {functionName}
There is also a constructor method.
constructor(props) {

    super(props)

    this.handleClick = this.handleClick.bind(this)

}
Biding value of “this” to the function of the class instance helps to avoid binding in the render method, which could hinder performance by recreating function for every render.
You can find the list of supported events at the official documentation of React.
Events handling is an easy concept in React, except for “this”, and “bind”. Go through the examples given above. If you still feel to ask any question, leave it in the comment section below and I will get back to you at the earliest.
| React Method State and Lifecycle | Tutorial Home | React Conditional Rendering |
Comments