
How to use PHP with React to create a Feedback form
So, let’s start from the basics.
Creating the react app
If you haven’t installed the create-react-app on your PC, you should install it.
Go to your command prompt and enter the following commands to access your www directory.
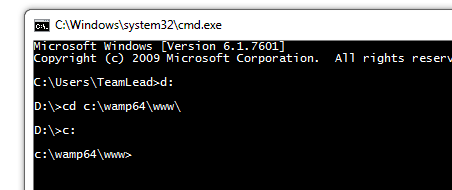
Now, enter
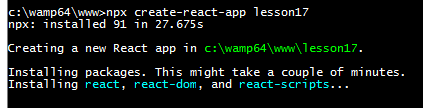
npx create-react-app lesson17
lesson17 is the name of the project folder. You can call it anything you like.
As we are using the PHP at the backend, you need to create this folder this your www directory where Apache can access and process the PHP code.
After the successful installation of React app in www directory, you will see the following structure.
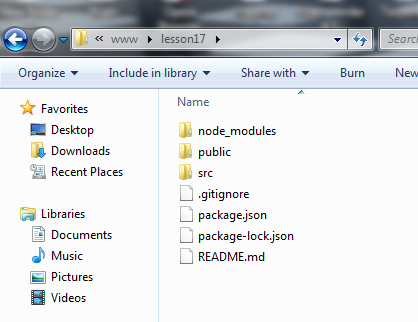
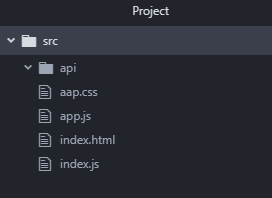
Go to the src directory and delete all files. We are going to create our files from scratch.
This is what src directory looks like
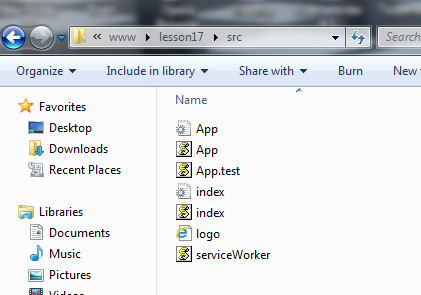
Now go on and create index.html, index.js, app.js, app.css, and a directory API to hold the PHP files.
Index.html
<!doctype HTML>
<html lang="en">
   <head>
      <title>First program in React</title>
   </head>
   <body>
      <div id="root"> </div>
      <script src="index.js"></script>
   </body>
</html>
index.js
import React from 'react';
import ReactDOM from 'react-dom';
import App from './App';

ReactDOM.render(<App />, document.getElementById('root'));
aap.js
import React, {
    Component
} from 'react'
import ReactDOM from 'react-dom'
import Style from './style.css'

class App extends Component {
    render() {
        return (

            //jsx code for the feedback form goes here.
        )
    }
}
export default App;
As we are creating an HTML form, we are going to need a class-based component to maintain the states.
Now add the constructor function to initialize the states of the component with empty strings.
constructor(props) {
    super(props)
    this.state = {
        name: '',
        email: '',
        message: ''
    }
}
We need to create a form to take the user’s data and feedback
This is the final look of the feedback form

And here is the code for the feedback form in JSX.
<div className="container">
   <div className="box heading">
      <h1>EAT, DINE & <br/>DRINK</h1>
   </div>
   <div className=" box feedback-form">
      <p className="grey">SEND US YOUR FEEDBACK</p>
      <div className="inputstyle">
         <input type="text"
            placeholder="Enter your Name"
            />
      </div>
      <div className="inputstyle">
         <input type="text"
            placeholder="Enter your Email"
            />
      </div>
      <div className="inputstyle">
         <textarea placeholder="Your message goes here"></textarea>
      </div>
      <div className="btnstyle">
         <input type="submit"
            value = "Send"
            />
      </div>
   </div>
</div>
This will go inside the return() method of the App component.
The CSS of the form is:
@import url('https://fonts.googleapis.com/css?family=Open+Sans&display=swap');
* {
	font-family: 'Open Sans', sans-serif;
	box-sizing: border-box;
	padding: 0;
	margin: 0;
}

body {
	background-color: #D7D1DB;
}


/*sets the container & its background image*/

.container {
	width: 700px;
	height: 400px;
	position: absolute;
	top: 50%;
	left: 50%;
	margin-left: -350px;
	margin-top: -200px;
	background-image: url("Food-bg.jpg");
	background-position: center;
	-webkit-box-shadow: 1px 3px 14px 4px rgba(163, 160, 163, 1);
	-moz-box-shadow: 1px 3px 14px 4px rgba(163, 160, 163, 1);
	box-shadow: 1px 3px 14px 4px rgba(163, 160, 163, 1);
}

.box {
	width: 280px;
	margin: 20px;
}

.grey {
	color: #ccc;
}

.heading {
	border-left: 4px solid #c0c334;
	padding-left: 10px;
	color: #ccc;
}

.inputstyle {
	padding: 5px;
	border-bottom: 1px solid #c0c334;
	margin: 10px 0;
}

.btnstyle {
	padding: 5px;
	margin: 20px 0;
	background-color: #c0c334;
	border-radius: 5px;
	color: #1b1b1b;
}

input,
textarea {
	width: 100%;
	background: transparent;
	border: none;
	outline: none;
	color: #ccc;
}

.msg {
	color: #ccc;
	font-size: 95%;
}
Now, add a function to handle the submission of the form. To test everything is working, use console.log in the function for the time being.
onSubmit(event) {
    event.preventDefault();
    console.log(this.state);
}

Bind onSubmit(e)
function to the component.

this.onSubmit = this.onSubmit.bind(this);
Add the event handling on the submit button.
<input type="submit"
   value = "Send"
   onClick={e => this.onSubmit(e)}
/>
To set the states of the component equal to the values of the input field, you need to make few changes.
<input type="text"
   placeholder="Enter your Name"
   value={this.state.name}
   onChange={e => this.setState({ name: e.target.value })}
/>
This will make sure that every change in the input field is managed at the React end.
Similar treatment has to be done with other fields as well.
<div className="inputstyle">
   <input type="text"
      placeholder="Enter your Email"
      value={this.state.email}
      onChange={e => this.setState({ email: e.target.value })}
   />
</div>
<div className="inputstyle">
   <textarea placeholder="Your message goes here"
      value={this.state.feedback}
      onChange={e => this.setState({ feedback: e.target.value })}
   ></textarea>
</div>
We are almost done with the front-end part of the code.
Before moving on to the back-end, we need to add one more state to hold the status of the data being sent.
this.state ={name:'', email:'', message:'', dataSent:''}
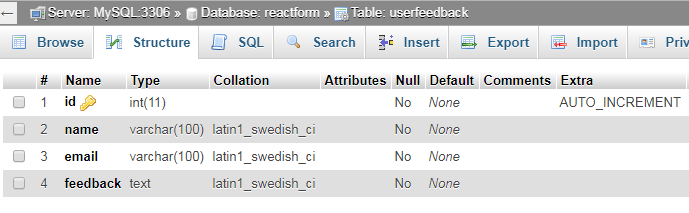
Creating MySQL Database & Tables
Create a database called ‘reactform’ and a table called ‘userFeedback’ to hold the data being entered.
The id is the primary key here.
Now go back to your project and create a PHP file called feedback_ac.php. It will contain the logic to process the data and change the internal state of the component using JSON encoding. FS
To execute the API and Http requests for React, we need to install the Axios package first.Axios is a promise-based HTTP client app to make easy and asynchronous HTTP requests to the server.
Go to your React app directory and run the
npm install axios command.

After installing Axios, simply import it in the App.js file.
import axios from 'axios'
Define constant variable to hold the absolute path for the feedback_ac.php form in App.js
const API_PATH = 'http://localhost/lesson17/src/api/feedback_ac.php';
Register axios with onSubmit event.
axios({
        method: 'post',
        url: API_PATH,
        headers: {
            'content-type': 'application/json'
        },
        data: this.state
    })
    .then(result => {
        console.log(result.data)

        this.setState({
            dataSent: result.data.sent,

        })
        console.log(this.state)
    })
    .catch(error => this.setState({
        error: error.message
    }));
feedback_ac.php
As the react app is on http://localhost:3000 and the server is on http://localhost, the server needs to allow cross-origin requests and Access-Control-Allow-Headers.
To read the content of the POST, we will use the PHP://input that returns the raw form of POST data. You can further decode it using json_decode() method to get an array to process.
<?php
header('Access-Control-Allow-Origin: *');
header("Access-Control-Allow-Methods: GET, POST, OPTIONS, PUT, DELETE");
header("Access-Control-Allow-Headers: Content-Type, Access-Control-Allow-Headers, X-Requested-With");
header("Content-Type: application/json; charset=UTF-8");
$rest_json = file_get_contents("php://input");
$_POST = json_decode($rest_json, true);
$conn = mysqli_connect("localhost", "root", "", "reactform");
$query = "insert into userfeedback (name,email, feedback)
values(
'" . $_POST['name'] . "',
'" . $_POST['email'] . "',
'" . $_POST['feedback'] . "'
)";
$result = @mysqli_query($conn, $query);
if ($result) {
    echo json_encode(["sent" => 1, ]);
} else {
    echo json_encode(["sent" => 0, ]);
}
?>
Now change the code in App.js render() method to display an appropriate message on the data insertion status.
<div className=" box feedback-form">
{this.state.dataSent ?
<p className="msg">
   SUCCESS<br/><br/>
   Thanks for submitting your feedback.<br/>
   We appreciate your time.
</p>
:
<p>
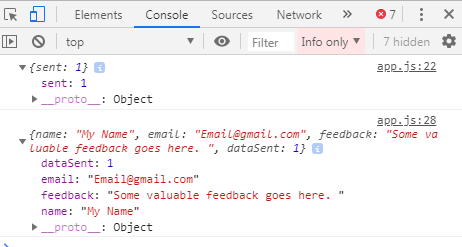
This is called conditional rendering. On the success of data insert, PHP sets the state.dataSent to 1 using JSON encoding.

The console

MySQL Database

You may feel it little overwhelming but this is how things are done in modern days of web development. React offers a much faster and asynchronous loading of the web page that justifies the complexity of this lesson to some extent.
Another alternative to using Axios is XMLHTTPRequest or Ajax using jQuery. Which way you choose depends a lot on the requirement or your personal preference.
I have tried to keep things simple and clean. You can try changing the fields or message or UI of the form. The more practice you do, the more you will learn. Let me know if you have any related questions. Leave your comments or questions in the comments section below and I will try to reply to you at the earliest.
| React and JavaScript << | Tutorial Home | >> React Introduction to Hooks |
Comments