
WordPress started as blogging software and got pretty famous in that. However, since WordPress 3.0, it has earned a reputation of a content management system (CMS) with the ability to handle almost any kind of website. WordPress can be used to create anything from an online portfolio to a multi-vendor E-Commerce platform.
Creating a custom post type in WordPress
The early versions of WordPress were capable handle only posts or pages which weren’t flexible enough. With the introduction of custom post type, WordPress provided its developers with unlimited options to extend the functionality of post type and try new ways to store and display content.
By default, WordPress supports many types of content, such as text, images, videos, etc. and has internally saved all content like posts or pages. Posts and pages are kept in the same database’s table wp_posts and can be differentiated based on their post type.
What is custom post type?
The custom post type is the post type declared and registered by the developers. As a developer, you don’t have to create the functionality of custom post type. WordPress will create the complete feature and Admin UI for the new custom post type automatically.
New custom post type will appear in the WordPress dashboard wp-admin menu in the sidebar. Most importantly, you can work with custom post type in the same way as you work with the default posts type – posts and pages.
WordPress has several post types ready to use: Post, Page, Attachment, Revision, Navigation Menu, Custom CSS, Changesets, and User Data Request.
Post – The most commonly used post type to create articles or posts by blogs or news websites. Usually, posts are shown in reverse chronological order (newest article comes first). Relevant posts are grouped using the default taxonomies like categories, tags, etc.
Page – Pages are similar to posts, except that they don’t fall under any category and lives outside the post-like hierarchical structure based on the time they were published. Pages can use different page templates to display other types of post types on it.
Attachment – It is a special type of post that contains information about files being uploaded via the WordPress media upload interface, such as its name, description, etc.
Revision – It is used to save a draft post or any past revisions of a post that is already published.
Navigation Menu – It holds information about the items of the navigation menu.
Why would you need a custom post type?
You may want to ask if WordPress has posts and pages for years, why do you need a custom post type?
Well, the answer is simple.
If you are not trying to achieve anything fancy, then posts and pages are enough, but to extend the functionality of website or blog, you will need to create your custom post type.
Now let’s say you want to create an E-Commerce website with WordPress. Where would you prefer to save your items? In Products or Posts?
Saving products in ‘products’ post type make more sense. Right?
Custom post types are not limited to just products. You can create as many post type as you want, such as news, books, movies, jokes, quotes, etc.
How to create a new custom post type
You can create a new custom post type in two ways. (1) With plugin and (2) Without plugin.
I try not to use a plugin if possible, but if you are learning WordPress or want full control over your custom post type, creating custom post type without a plugin is the recommended way.
Don’t worry, It’s straightforward and requires only a few steps to create and register a fully-functional and customized post type in WordPress.
In WordPress, a custom post type is easily created by using register_post_type() function. This has to be called before the admin_menu or after the init hook.
This function requires at least two parameters.
$post_type – A string representation of the post type. You can use a maximum of 20 characters and cannot use capital letters, underscores, or spaces.
$args – This is an array of argument that defines the post type and various options.
Let’s create a simple post type called products.
For the sake of simplicity, I’m using only the minimal required code. You can create a new plugin or use functions.php in your theme folder to add new post types.
Again to keep things simple, I am creating a new file functions.php.
<?php
function product_post_type() {
  register_post_type( 'product',
    array(
      'labels' => array(
        'name' => __( 'Products' ),
        'singular_name' => __( 'Product' )
      ),
      'public' => true,
      'has_archive' => true,
    )
  );
}
add_action( 'init', 'product_post_type' );
?>
This would create a new post type products. Go to http://yourdomain/wordpress/wp-admin/
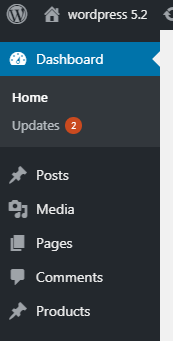
Admin Menu with Custom Type “Products”
When you click on Products > Add New, you get
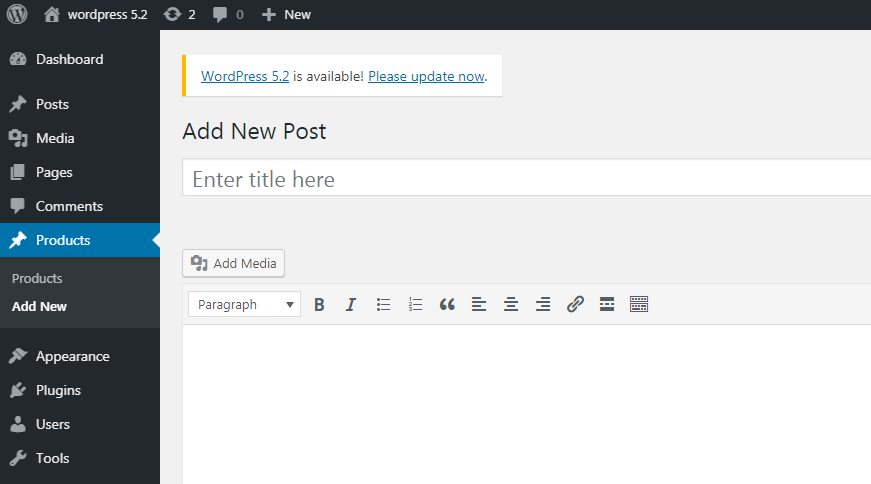
To replace ‘Add New Post’ title with ‘Add New Products’ and for other changes, let’s write some more code.
<?php
function product_post_type() {
 $labels = array(
 'name' => 'Products',     //General name of the post type
 'singular_name' => 'Product',  // singular name of the post type
 'add_new' => 'Add New Product',
 'add_new_item' => 'Add New Product',
 'edit_item' => 'Edit Product',
 'new_item' => 'New Product',
 'all_items' => 'All Products',
 'view_item' => 'View Product',
 'search_items' => 'Search Products',
 'not_found' => 'No products found',
 'not_found_in_trash' => 'No products found in Trash',
 'parent_item_colon' => '',
 'menu_name' => 'Products'
 );
 $args = array(
 'labels' => $labels,
 'public' => true
 );
 register_post_type( 'products', $args );
}

add_action( 'init', 'product_post_type' );

?>
Code Explanation
The function register_post_type() has two parameters:
Post_type name – Set products here.
$args – This is an array of arguments to set the options for the new custom post type.
Some of the commonly used arguments are:
- Public – By default, the value is set to false. To make the new custom post type available to the admin dashboard, you need to set it as true.
- Labels – This is an array of labels that represents the new custom post type and will replace the default ‘post’ with the name of the custom post type.
- Hierarchical – A hierarchical post type creates a tree-like structure. By default, the value is false.
- Has_archive – This allows a new custom page to have an archive page. If set to true, permalink rewrite rules will be created for your custom post.
- Description – A short introduction of your custom post type such as what it does and why we are using it.
As you can see, WordPress has created a new UI for the new custom post type ‘product.’ You can now add new more products as well as edit/delete the existing ones, just like the posts and pages in WordPress.
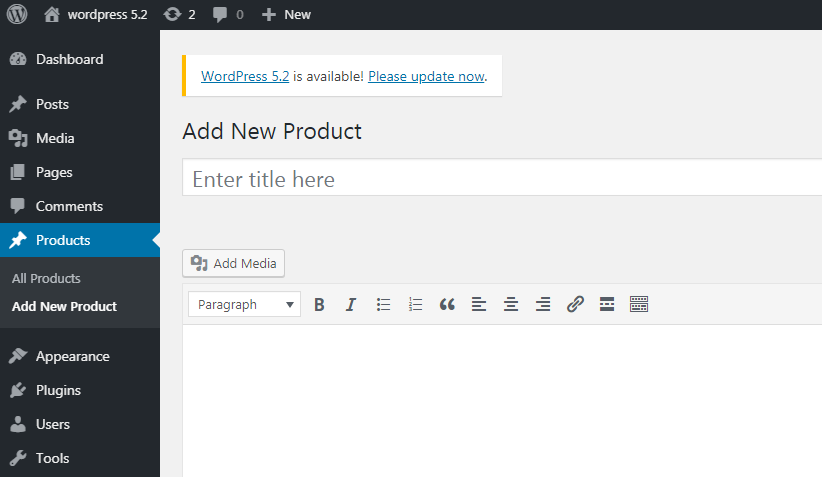
Custom Post Type Result
How to display custom post type
Now you have created a custom post type. It is up to your theme of how and where to show your post type. To display custom post type, you need a customized loop. We have already learned how to use WP_Query to customize our loop to display posts in the article A Beginners Guide to the Loop in WordPress
<?php
$args = array('post_type' => 'products');
// the query
$loop = new WP_Query($args);
if($loop -> have_posts()){
	while($loop -> have_posts()){
		$loop -> the_post();
		echo '<a href="'.get_the_permalink().'">'.get_the_title(). '</a>';
		the_content();
		}
}else{
	  echo 'There are no products in the catalogue';
}
wp_reset_postdata();
?>
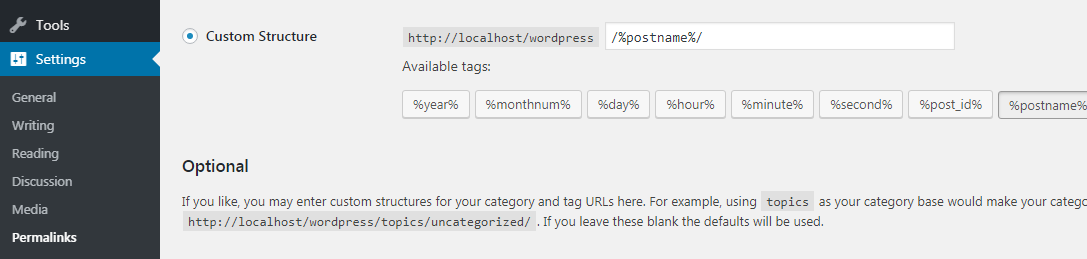
The single template will be saved as single-{post_type}.php. So for products, the single template would be single-products.php.
For archives, WordPress will use archive-{post_type}.php
Taxonomy in WordPress
Taxonomy refers to the way of grouping related post types. By default, WordPress comes with three taxonomies:
- Category – This is a hierarchical representation of post types. Related posts type can be listed in a category. Any category can further be divided into sub-categories.
- Tag – These are separate labels attached to posts
- Links – This is the category for grouping similar links together.
Creating custom taxonomies
You can use the existing categories for your custom posts type, but it is straightforward to create custom categories to go along with these. The following example creates a new category type – product category, which is going to hold only products.
Now you will use register_taxonomy() function instead of register_post_type(), and as you can see, there isn’t much change in the rest of the code.
The first parameter you pass is the taxonomy name, which represents the new custom taxonomy, in our case is ‘product categories’. The second parameter is the label of post type you want to create a taxonomy for. The third parameter is for passing an array of arguments to set the other options.
<?php
function product_cateogries() {
  $labels = array(
    'name'              => _x( 'Product Categories', 'taxonomy general name' ),
    'singular_name'     => _x( 'Product Category', 'taxonomy singular name' ),
    'search_items'      => __( 'Search Product Categories' ),
    'all_items'         => __( 'All Product Categories' ),
    'parent_item'       => __( 'Parent Product Category' ),
    'parent_item_colon' => __( 'Parent Product Category:' ),
    'edit_item'         => __( 'Edit Product Category' ),
    'update_item'       => __( 'Update Product Category' ),
    'add_new_item'      => __( 'Add New Product Category' ),
    'new_item_name'     => __( 'New Product Category' ),
    'menu_name'         => __( 'Product Categories' ),
  );
  $args = array(
    'labels' => $labels,
    'hierarchical' => true,
  );
  register_taxonomy( 'product_category', 'products', $args );
}
add_action( 'init', 'product_cateogries', 0 );
?>
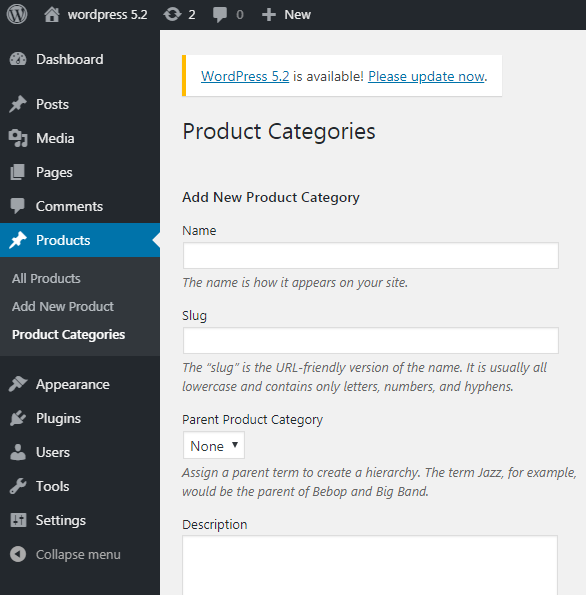
Custom Product Category
I hope you enjoyed reading this article regarding the custom post in WordPress. In case you find any concept hard-to-understand or confusing, please let me know in the comments section below.
Comments