In this lesson, you will learn about a chaining concept in jQuery. This is undoubtedly the most powerful feature of jQuery which enables developers to write multiple lines of code in a single link. It connects multiples function, events on the element being selected.
What is chaining in jquery?
jQuery was created with one aim in mind – to make JavaScript easier and faster to write and maintain. One of the goals of the library is to allow you to do a lot of stuff with a few lines of codes. The achieve that, jQuery uses chaining functions. It lets you select one element, and bind multiple jQuery functions to that element to making the programming faster.
Advantages of chaining
So why do you need chaining?
- The obvious advantage is the need for less code
- It improves performance
- You don’t have to select the same element again and again.
- By chaining multiple methods, you can reduce the workload on the browser to look for the same element to execute each function.
Example of chaining in jQuery
Let’s understand the concept of chaining with examples:
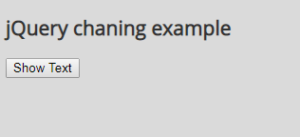
This example has a simple paragraph and a button. When the user clicks on the button, jQuery will display the hidden text and then hides it back after 5 seconds (5000 milliseconds).

jQuery Chaining Example I

jQuery Chaining Example II
The HTML
<h2>jQuery chaining example</h2>
<p>Programming today is a race between
software engineers striving to build bigger
and better idiot-proof programs, and the
Universe trying to produce bigger and better
idiots. So far, the Universe is winning. </p>

<button>Show Text</button>
The Style
<link href="https://fonts.googleapis.com/css?family=Open+Sans" rel="stylesheet">
<style>
*{box-sizing:border-box;}
body{font-family: 'Open Sans', sans-serif; color:#333; font-size:14px; background-color:#dadada;}
p{display:none;}
</style>
The jQuery
<script src="https://ajax.googleapis.com/ajax/libs/jquery/3.4.0/jquery.min.js"><script>

    $(document).ready(function(){
        $("button").click(function () {
            $("p").slideDown("slow").css("color", "red").slideUp(5000);
        });
    });
</script>
If you are confused from writing everything in one line, Well, jQuery lets you arrange the code in a very readable manner.
You can also write the above code as follows:
$(document).ready(function () {
    $("button").click(function () {
        $("p").slideDown("slow")
            .css("color", "red")
            .slideUp(5000);
    });
});
</script >
The chain starts from left to right, so left most function will be executed first, and so on.
When a user clicks on the button, jQuery will select the <p> tag and execute slideDown() function on it, then css() function and in the end slideUp() function will be called.
Now if you have to write the same code without chaining in jQuery, it would be as following:
<script>
    $(document).ready(function(){
        $("button").click(function () {
            $("p").slideDown("slow");
            $("p").css("color", "red");
            $("p").slideUp(5000);
        });
    });
</script>
With chaining, you wrote a single line to achieve the same effect which you achieved with 3 lines of code without it.
Imagine, three times less effort while writing an enterprise level application. This would save you from the extra effort, time, and would make the code really easy to read and manage.
| jQuery Selecting Elements | Tutorial Home | jQuery Content Manipulation |

Comments