
Import Excel Spreadsheet Data into GridView in ASP.NET
The application will include a Browse button that will allow you to choose the Excel file that you wish to import. The contents of the Excel file will then be used to populate the GridView control. There is going to be an Upload button as well which can be used to upload an Excel file.
Here is how the application can be created.
- Launch Visual Studio.
- Create a new Project.
- In the new Project window, select Web from the options on the left.
- Select ASP.NET Web Forms Application.
- Set the location from the options on the bottom where you’d like to store the application you are creating.
- Name your project. Here I have named it ShowExcelData
Now add a GridView control to your default page as shown below:
    <div>
        <div>
            <asp:FileUpload ID="FileUpload1" runat="server" />
            <asp:Button runat="server" ID="BtnUpload" OnClick="BtnUpload_OnClick" Text="Upload" />

        </div>
        <div>
            <asp:UpdatePanel ID="UpdatePanel1" runat="server" UpdateMode="Conditional">
                <ContentTemplate>
                    <asp:GridView ID="Gridview1" runat="server" AutoGenerateColumns="false" CssClass="Grid">
                        <Columns>
                            <asp:BoundField DataField="Name" HeaderText="Name"
                                ApplyFormatInEditMode="true" ShowHeader="true" NullDisplayText="Null" />
                            <asp:BoundField DataField="Email" HeaderText="Email"
                                ShowHeader="true" />
                        </Columns>
                    </asp:GridView>
                </ContentTemplate>
            </asp:UpdatePanel>
        </div>
    </div>
Add the CSS to the default.aspx file:
    <style>
        .Grid {
            background-color: #fff;
            margin: 5px 0 10px 0;
            border: solid 1px #808080;
            border-collapse: collapse;
            font-family: 'Times New Roman';
            color: #000000;
        }

            .Grid td {
                padding: 2px;
                border: solid 1px #363670;
            }

            .Grid th {
                padding: 10px 10px;
                color: #fff;
                background: #552525;
                border-left: solid 1px #525252;
                font-size: 1em;
            }
    </style>
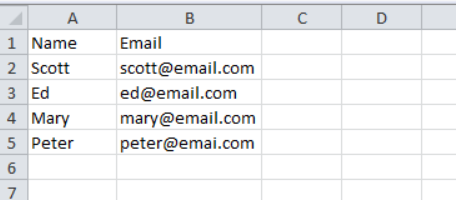
Create an excel file, add two columns to it, and few records.
Add namespaces as shown below:
using System.Data.OleDb;
using System.Web.Hosting;
Now add the BtnUpload_OnClick function to the code behind:
    protected void BtnUpload_OnClick(object sender, EventArgs e)
    {
        {

            if (FileUpload1.HasFile)
            {
                string connectionstring = "";
                string filename = Path.GetFileName(FileUpload1.PostedFile.FileName);
                string fileextension = Path.GetExtension(FileUpload1.PostedFile.FileName);
                string filelocation = HostingEnvironment.ApplicationPhysicalPath + filename;
                FileUpload1.SaveAs(filelocation);
                if (fileextension == ".xlsx")
                {
                    connectionstring = "Provider=Microsoft.ACE.OLEDB.12.0;Data Source=" + filelocation + ";Extended Properties=\"Excel 12.0;HDR=YES;IMEX=2\"";
                    OleDbConnection conn = new OleDbConnection(connectionstring);
                    OleDbCommand cmd = new OleDbCommand();
                    cmd.CommandType = System.Data.CommandType.Text;
                    cmd.CommandText = "select * from [Sheet1$]";
                    cmd.Connection = conn;
                    OleDbDataAdapter oleDbDataAdapter = new OleDbDataAdapter(cmd);
                    DataTable  dataTable = new DataTable();
                    oleDbDataAdapter.Fill(dataTable);
                    Gridview1.DataSource = dataTable;
                    Gridview1.DataBind();
                }
            }
            else
            {
                BtnUpload.Attributes.Add("OnClientClick", "javascript:alert('Please Select an Excel file');");
                Gridview1.DataSource = null;
                Gridview1.DataBind();
            }
            FileUpload1.Attributes.Clear();
        }
    }
Summary
This is all that you need. As mentioned before, it’s a simple application where you will be needed to select the Excel file, the contents of which will then be displayed on the page using GridView control.
Comments